
Eliminating an oil tank, whether it’s over-the-ground or underground, is a basic errand that requires cautious preparation, proficient skill, and adherence to ecological guidelines. Here is a far-reaching, bit-by-bit manual to assist you with understanding the oil tank removal process.
Beginning Appraisal and Allowing
Stage 1: Site Evaluation
Enlist an Expert: Connect with a guaranteed tank evacuation expert to evaluate the condition and area of the tank.
Tank Assessment: The expert will examine the tank for holes, consumption, and any indications of harm.
Soil Testing: Assuming the tank is underground, soil testing around the tank might be directed to check for tainting.
Stage 2: Acquire Licenses
Nearby Guidelines: Contact your neighborhood region to comprehend the licenses expected for oil tank evacuation.
Grant Application: Present the important administrative work and acquire the expected licenses prior to continuing with the evacuation.
Getting ready for Evacuation
Stage 3: Void the Tank
Siphon out Leftover Oil: Any excess oil in the tank should be siphoned out and securely discarded by an authorized garbage removal organization.
Clean the Tank: The inside of the tank ought to be cleaned to eliminate ooze and buildup.
Stage 4: Security Precautionary measures
Site Arrangement: Clear the region around the tank and guarantee that it’s available for evacuation hardware.
Defensive Stuff: Guarantee that laborers wear suitable defensive stuff to forestall openness to risky materials.
Tank Evacuation Cycle
Stage 5: Disengage and Exhume
Detach Funneling: All lines and associations with the tank ought to be securely separated.
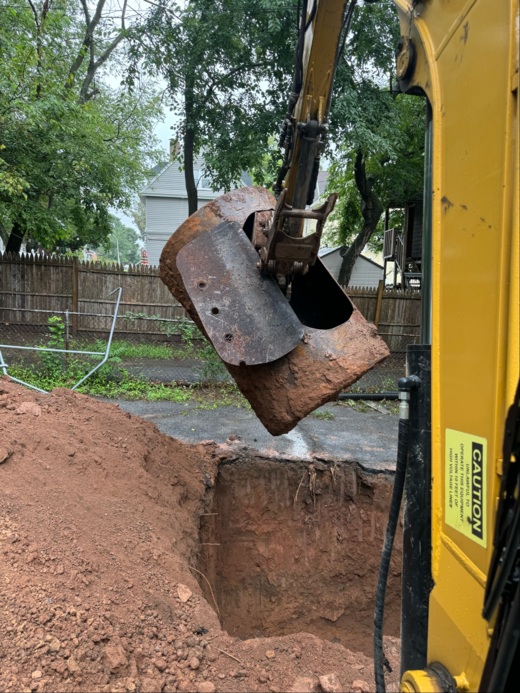
Uncovering (if underground): Cautiously exhume around the tank, utilizing fitting hardware, taking care not to harm the tank.
Stage 6: Eliminate the Tank
Lift and Eliminate: Use cranes or other lifting hardware to eliminate the tank, starting from the earliest stage of its area, securely.
Transport: Transport the tank to an authorized office for removal or reusing.
Post-Expulsion Systems
Stage 7: Soil Testing and Remediation
Soil Testing: Lead present evacuation soil testing on check for any tainting.
Soil Remediation: Assuming tainting is found, draw in a natural expert to remediate the impacted soil.
Stage 8: Documentation and Revealing
Documentation: Keep nitty gritty records of the evacuation interaction, including licenses, reviews, and removal receipts.
Last Report: Present a last report to the nearby specialists to affirm the protected evacuation and removal of the tank.
Site Reclamation
Stage 9: Refilling and Finishing
Refill: Assuming the tank was underground, fill the unearthing site with clean soil and reduce it appropriately.
Arranging: Reestablish the region to its unique condition or according to the settled after finishing plan.
Stage 10: Follow-Up
Ordinary Reviews: Timetable occasional assessments to guarantee that there are no lingering ecological effects from the eliminated tank.
At the end, we can say that eliminating an oil tank is a mind boggling process that requires proficient skill, adherence to guidelines, and fastidious preparation. By following these means, you can guarantee a protected, proficient, and ecologically capable oil tank expulsion. Continuously talk with confirmed experts and consent to neighborhood guidelines to relieve gambles and safeguard your property and the climate. Need assistance with oil tank removal? Contact Simple Tank Services for professional and reliable tank removal solutions. Our experts are equipped to handle every aspect of the process, ensuring your peace of mind and environmental safety.