
Removing an underground oil tank can be a complex and potentially hazardous task, but with the right approach, it can be done safely and efficiently. In this blog, we’ll guide you through the step-by-step process of underground oil tank removal, ensuring that you understand the importance of safety and compliance with local regulations.
Assess the Situation
Before beginning the removal process, it’s crucial to assess the condition of your underground oil tank. Look for signs of leakage, corrosion, or damage. If you’re unsure, it’s best to consult with a professional who specializes in underground oil tank removal. They can perform tests to determine whether the tank poses any risks.
Check Local Regulations
Underground oil tank removal is often subject to local and state regulations. Before proceeding, familiarize yourself with the necessary permits and environmental regulations in your area. This ensures that the removal process complies with all legal requirements and minimizes environmental impact.
Hire a Professional Service
While some homeowners may consider a DIY approach, it’s generally safer and more effective to hire a licensed and experienced professional for underground oil tank removal. These experts have the knowledge, tools, and equipment necessary to handle the job safely, including potential hazardous materials.
Prepare the Site
Once you’ve hired a professional, they will prepare the site for removal. This involves:
Clearing the Area: Remove any obstacles around the tank, such as landscaping or debris.
Disconnecting Utilities: Ensure that any utilities connected to the tank are safely disconnected to prevent accidents during removal.
Drain and Clean the Tank
Before the tank can be removed, it must be drained and cleaned to eliminate any residual oil or contaminants. This process typically involves:
Pumping Out Remaining Oil: Professionals will use specialized equipment to pump out any remaining oil from the tank.
Cleaning the Interior: The interior of the tank will be cleaned to remove sludge and residues, making it safe for removal.
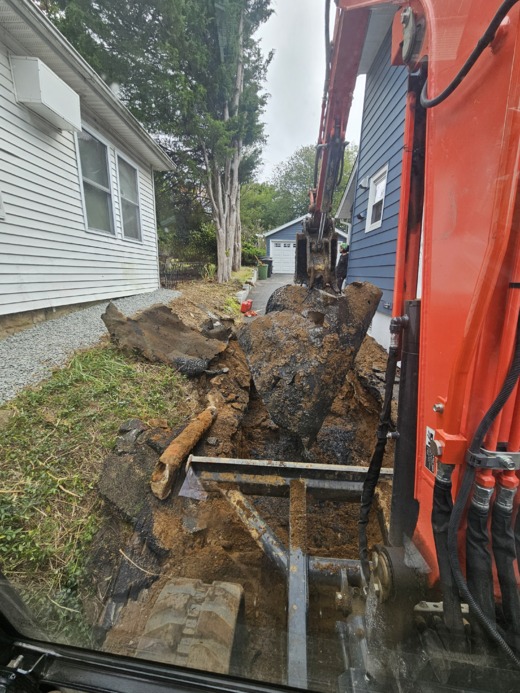
Excavate the Tank
Once the tank is empty and clean, the professionals will excavate the area around it. This involves:
Digging around the Tank: Careful excavation is necessary to expose the tank without causing damage to surrounding structures or utilities.
Removing the Tank: After exposing the tank, it will be carefully removed from the ground using specialized equipment.
Disposal and Site Restoration
After the tank has been removed, it must be disposed of according to local regulations. Many professionals will handle this aspect for you, ensuring that the tank is disposed of safely and legally. Additionally, the site may need to be restored by backfilling the excavation and re-seeding any disturbed landscaping.
Conduct Soil Testing
After the removal, it’s advisable to conduct soil testing to check for any contamination that may have occurred during the tank’s lifetime. If contamination is found, further remediation steps may be necessary.
Document the Process
Keep a detailed record of the removal process, including permits, inspections, and soil testing results. This documentation is essential for future property transactions and can be crucial for insurance purposes.
Conclusion
Adjusting to the realities of underground oil tank removal involves understanding the complexities and safety considerations associated with the process. By following these steps and working with professionals, you can ensure that your underground oil tank is removed safely and in compliance with all regulations. If you’re facing the need for underground oil tank removal, don’t hesitate to reach out to Simple tank services who can guide you through the process.