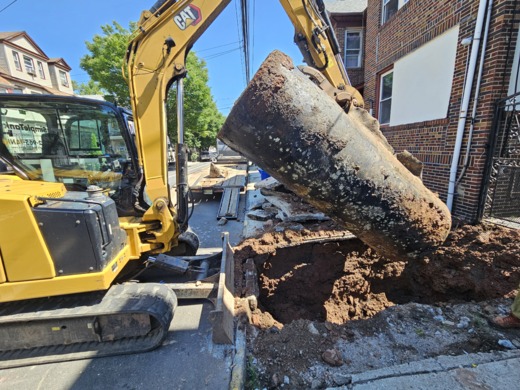
Underground oil tanks, once a staple for heating homes and businesses, can become a significant liability over time. As these tanks age, they are prone to corrosion and leaks, posing serious environmental and health risks. For homeowners and property managers in New Jersey, navigating the process of removing an underground oil tank can be complex and daunting. This blog aims to guide you through the steps involved in oil tank removal and provide insights into the importance of this process.
Why Remove an Underground Oil Tank?
Environmental Protection
Leaking oil tanks can contaminate soil and groundwater, leading to long-term environmental damage. Removing these tanks helps prevent potential spills and contamination.
Health and Safety
Oil leaks can pose health risks to residents and neighbors. Removing old tanks mitigates the risk of exposure to hazardous substances.
Regulatory Compliance
New Jersey has stringent regulations regarding underground oil tanks. Ensuring compliance can help avoid hefty fines and legal issues.
Property Value
An old, potentially leaking oil tank can decrease property value and deter potential buyers. Removing the tank can enhance property marketability.
The Underground Oil Tank Removal Process
Step 1: Initial Assessment and Consultation
The first step in the process is to conduct an initial assessment. A professional company will evaluate the condition of your tank, inspect for any leaks, and provide a detailed estimate of the removal cost. This assessment will also involve reviewing local regulations to ensure compliance.
Step 2: Obtaining Permits
Before any removal work begins, necessary permits must be secured from local authorities. This step ensures that the removal process adheres to all regulations and safety standards.
Step 3: Tank Excavation
The removal process starts with excavating the area around the tank. This involves digging up the tank while taking care to minimize damage to the surrounding property. Professional companies use specialized equipment to safely unearth the tank.
Step 4: Tank Removal
Once the tank is excavated, it is carefully removed from the ground. The tank is then cleaned and transported to a disposal facility. During this step, the surrounding soil is tested for any signs of contamination.
Step 5: Soil Testing and Remediation
If contamination is detected, the affected soil must be removed and properly disposed of. Remediation efforts may include soil replacement and groundwater treatment to ensure environmental safety.
Step 6: Site Restoration
After the tank is removed and any necessary remediation is completed, the excavation site is backfilled with clean soil. The area is then restored to its original condition, ensuring minimal disruption to your property.
Choosing the Right Company for Oil Tank Removal
Expertise and Experience
Look for a company with extensive experience in underground oil tank removal. Experienced professionals are better equipped to handle the complexities of the process and ensure compliance with regulations.
Regulatory Knowledge
The company you choose should have a thorough understanding of local, state, and federal regulations regarding oil tank removal. This knowledge is crucial for obtaining the necessary permits and avoiding legal issues.
Comprehensive Services
Opt for a company that offers a full range of services, from initial assessment to site restoration. Simple Tank Services can simplify the process and provide peace of mind.

